Ready to start your G-Shock modification journey? This complete beginner’s guide walks you through everything you need to know—from choosing your first watch to completing your first successful mod.
Why Mod Your G-Shock?
G-Shock modification has exploded in popularity, and for good reason:
- Personalization: Create a watch that’s uniquely yours
- Luxury look for less: Transform a $100 watch into something that looks like a $500+ timepiece
- Community: Join a passionate global community of modders
- Learning: Develop valuable skills in watch mechanics
- Fun: It’s genuinely enjoyable to build something with your hands
“My first mod was just a bezel swap, but I was hooked. Now I’ve built over 20 custom G-Shocks.” — Reddit user, r/gshockmodification
Choosing Your First G-Shock to Mod
📸 IMAGE NEEDED: Hero image showing 3-4 popular beginner G-Shock models side by side (GA2100, DW5600, F-91W)
Best G-Shocks for Beginners
1. GA2100 “CasiOak” — Most Popular Choice
- Price: $80-$120
- Why it’s great: Huge aftermarket support, Royal Oak style potential
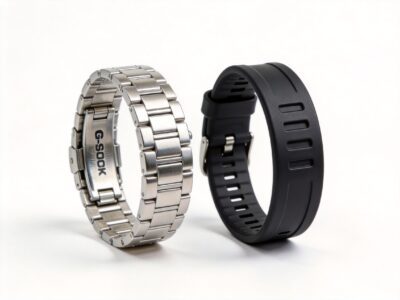
- Best mods: Bezel swaps, dial changes, metal bracelets
- Skill level: Beginner-friendly
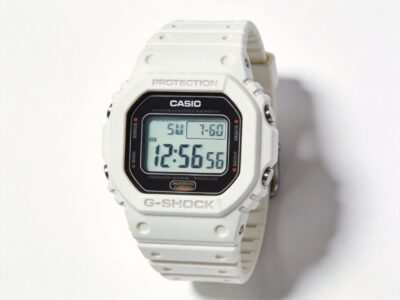
2. DW5600 — Classic Square
- Price: $50-$80
- Why it’s great: Affordable, iconic design, lots of parts available
- Best mods: Bezel swaps, screen mods, custom straps
- Skill level: Very beginner-friendly
3. F-91W — Budget Champion
- Price: $15-$25
- Why it’s great: So cheap you can’t ruin anything valuable
- Best mods: Strap swaps, screen tints, case mods
- Skill level: Perfect for absolute beginners
Essential Tools for Your First Mod
📸 IMAGE NEEDED: Photo of complete beginner tool kit laid out on work surface
Must-Have Tools
- Precision screwdriver set (1.4mm, 1.5mm sizes) — $15-$30
- Spring bar tool — $8-$15
- Case back opener (Jaxa style for screw-backs) — $15-$30
- Tweezers (anti-magnetic preferred) — $10-$20
- Microfiber cloth — $5
Nice-to-Have Tools
- Loupe or magnifying glass — $10-$30
- Rodico cleaning putty — $8
- Silicone grease (for gaskets) — $5
- Bezel removal tool — $10-$20
💰 Total beginner tool budget: $50-$100
Your First Mod: Step-by-Step
We recommend starting with a strap change or bezel swap—these are low-risk, high-reward modifications that build confidence.
Option A: Strap Replacement (Easiest)
📸 IMAGE NEEDED: Step-by-step photos of strap replacement process (3-4 images)
- Gather tools: Spring bar tool, new strap, soft surface
- Remove old strap: Insert forked end of spring bar tool between strap and lug
- Compress spring bar: Push down and pull strap away
- Transfer spring bars: Move to new strap if needed
- Install new strap: Insert one end, compress, and seat the other
- Test security: Give the strap a firm tug to ensure it’s seated
⏱️ Time required: 5-10 minutes
🎬 VIDEO NEEDED: Short video showing strap replacement process (optional)
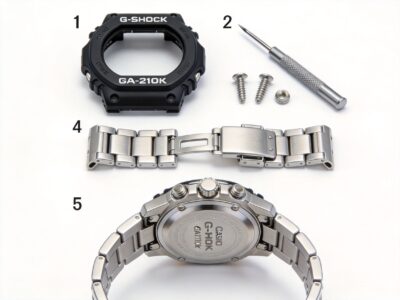
Option B: Bezel Swap (Easy-Moderate)
📸 IMAGE NEEDED: Before/after comparison of GA2100 bezel swap
- Gather tools: Bezel removal tool or guitar pick, new bezel
- Work on soft surface: Prevent scratches if parts drop
- Pry off old bezel: Insert tool at 12 o’clock position, gently pry upward
- Work around the bezel: Slowly release clips around the perimeter
- Clean the case: Remove any dust or adhesive residue
- Install new bezel: Align properly and press firmly until it clicks
- Check fit: Ensure bezel sits flush with no gaps
⏱️ Time required: 15-30 minutes
🎬 VIDEO NEEDED: Timelapse or step-by-step video of bezel installation
Common Beginner Mistakes to Avoid
1. Using the Wrong Screwdriver Size
📸 IMAGE NEEDED: Comparison of correct vs incorrect screwdriver fit
Using a screwdriver that’s too small strips screw heads. Always match the driver to the screw—a 1.4mm screw needs a 1.4mm driver.
2. Forcing Stuck Parts
If something doesn’t move easily, stop. Apply gentle pressure and patience. Forced parts break.
3. Working Without Magnification
Small parts are easy to lose. Use a loupe and work over a tray or cloth.
4. Skipping the Gasket Check
If you open the case, always inspect and lubricate the O-ring gasket. Water damage isn’t covered by warranty after mods.
Where to Buy G-Shock Mod Parts
- Specialized mod shops: Quality assurance, support, curated selection
- AliExpress: Lowest prices, huge variety, check reviews carefully
- eBay: Mix of new and used, good for OEM parts
- Amazon: Fast shipping, good for tools, limited watch parts
For your first mod, consider buying from a specialized shop—the extra cost is worth the support and quality guarantee.
After Your First Mod: What’s Next?
- Take photos: Document your build for social media and future reference
- Test water resistance: If you opened the case, verify the seal
- Share your work: Post on r/gshockmodification for feedback
- Plan your next build: Once you’re comfortable, try a dial swap or complete kit
Beginner Mod Progression Path
| Skill Level | Recommended Mods | Tools Needed |
|---|---|---|
| Level 1 | Strap swap | Spring bar tool only |
| Level 2 | Bezel swap (snap-on) | + Bezel tool |
| Level 3 | Dial change | + Case opener, tweezers |
| Level 4 | Complete mod kit | Full tool set |
| Level 5 | Custom builds for others | Professional tools |
Frequently Asked Questions
Will modding void my warranty?
Generally, yes. Opening the case or modifying parts will void the manufacturer warranty. Consider this before modding a new watch.
Can I undo my modifications?
Most mods are reversible if you keep your original parts. Strap changes are completely reversible. Bezel swaps are usually reversible. Dial changes require keeping the original dial.
What if I break something?
G-Shocks are remarkably durable. Most mistakes can be fixed with replacement parts. Start with an inexpensive watch so mistakes aren’t costly.
Conclusion
Your first G-Shock mod is the beginning of an addictive hobby. Start simple with a strap change or bezel swap, invest in quality tools, and work patiently. Before you know it, you’ll be building custom watches that turn heads and spark conversations.
Ready to start? Browse our G-Shock mod parts or check out our complete tool guide to build your kit.
Recommended Parts and Next Steps
If you are planning a build from this guide, these are the most relevant GshockMod shopping paths to continue from here: